★如何安装Puppy(How to install Puppy)
如何安装Puppy友情提示:Windows用户如果没有特别需求,推荐在windows下使用pup2usb将puppy直接安装到硬盘或U盘中,这是最简便的精简(frugal)安装方式。这种pup2usb方法无需刻盘,不需要对硬盘进行专门分区,直接安装puppy到硬盘的NTFS或FAT32分区即可。(实际安装过程只是复制三到四个puppy专用文件到windows分区的puppy文件夹下,再在windows启动菜单里添加puppy启动项)
如果你不喜欢每次用光盘启动Puppy,您可以安装Puppy到硬盘中。这就需要一些准备工作。
硬盘,分区和文件系统
一个硬盘可以分为一个或多个分区。如果您要创建几个分区的硬盘,每个分区就好象操作系统中的一个硬盘。换句话说:尽管你只有一个硬盘在电脑上,你会在Windows或Linux中看到好几个(虚拟)硬盘。Windows会给每个分区指定盘符(包括软驱和CD/DVD驱动器)。通常A是软盘驱动器,C是硬盘(第一个分区),D是CD-ROM驱动器,E是硬盘(第二分区),F是硬盘(第三分区),等等。每个分区都有自己的文件系统,Windows通常使用NTFS(在WinXP中)或FAT32(在Win98,Win95中)。
在Linux下(第一个)硬盘的地址是/dev/hda或/dev/sda。如果您的电脑有第二个硬盘,地址为/dev/hdb或/dev/sdb。分区从1开始按顺序编号。您的硬盘分区地址是/dev/hda1(相当于Windows中的C盘),/dev/hda2(相当于Windows中的E盘),/dev/hda3,等等。Linux可以在不同的文件系统中工作,如ext2,ext3和ReiserFS。这些文件系统是Windows无法读取的。此外,Linux也可以在Windows文件系统中工作。利用FAT32在Windows和Linux之间交换文件是一个不错的办法。
How to install Puppy
If you don't feel like booting Puppy from CD-ROM all the time, you can install Puppy to hard disk. This requires some preparation.
Harddrives, partitions and filesystems
A harddrive can be divided in one or more partitions. If you create several partitions on a harddrive, each partition appears like a harddrive in the operating system. In other words: although you have only one harddrive in your PC, you will see several (virtual) hard-drives with Windows or Linux. Windows designates the harddrives (as well as the floppy disk drive and CD/DVD drive). In Windows they will be identified with letters. Usually A designates the floppy disk drive, C the harddrive (first partition), D the CD-ROM drive, E the harddrive (second partition), F the harddrive (third partition) and so on. Each partition has its own file system, Windows normally uses NTFS (Windows XP) or FAT32 (Win98, Win95).
With Linux the (first) harddrive is adressed as /dev/hda or /dev/sda. If your PC has a second harddrive, it is adressed as /dev/hdb or /dev/sdb. The partitions are sequentially numbered, starting with one. The partitions of your harddrive are adressed as /dev/hda1 (corresponds to the Windows C-partition), /dev/hda2 (corresponds to the Windows E-partition), /dev/hda3 and so on. Linux can work with different file systems such as ext2, ext3 or ReiserFS. These file systems are not readable by Windows. In addition Linux can work with Windows filesystems too. Due to this option a FAT32-Partition is ideal to exchange files between Windows and Linux.
整理磁盘碎片(Defragment your hard disk)
Defragment your hard diskBefore creating new partitions on your hard drive, you shoulddefragment the drive so that all data is stored at the beginning of theexisting partition. Here is how to do it:
Start up Windows.
First, backup your files to CD-ROM, DVD, or an external hard drive.Also remember to backup your Internet link collection (Favourites) andyour e-mails. If your data is encrypted, it is advisable to decrypt itbefore backing it up. This protects you from data loss becausemodifying hard drive partitions always carries the risk of data loss.
Next, start the Disk Defragmenter program under Windows. The programis located at "Start | All Programs | Utilities | System Programs |Disk Defragmenter". Select hard drive c:\ and click the "Check" button.
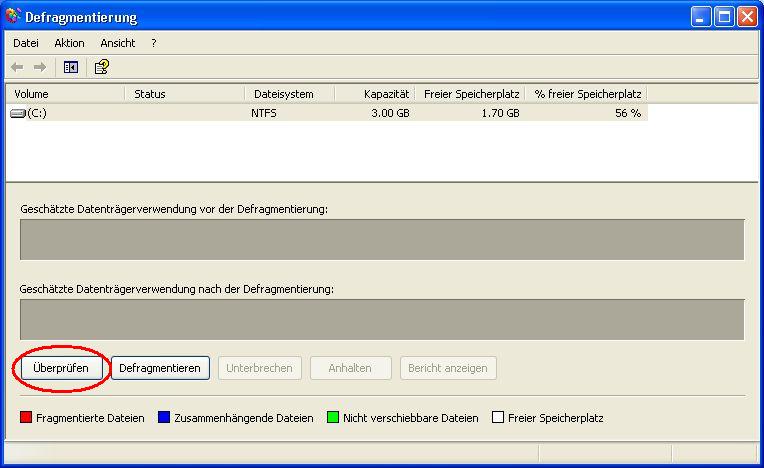
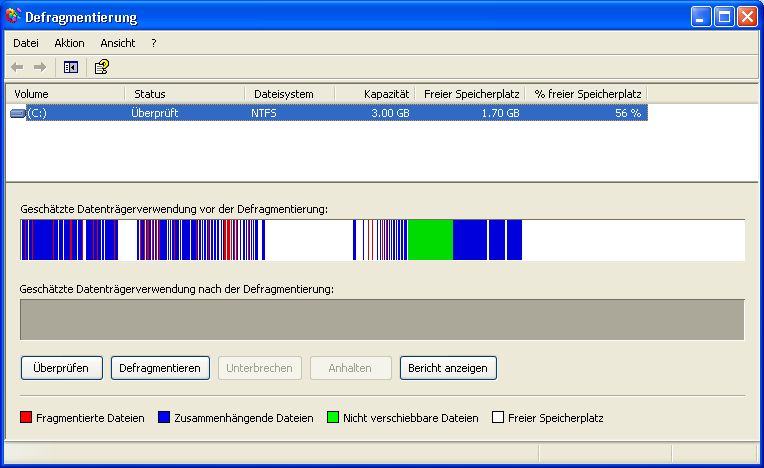
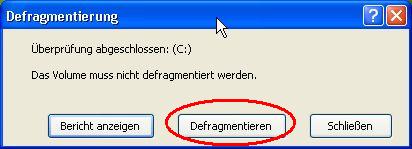
Click the "Defragment" button. Depending on the size of thepartition and the amount of data on it, this process can take a longtime (over an hour). If you have very large amounts of data, you canspeed up this process drastically by deleting your files after you havebacked them up (see the previous item) and restoring them once you aredone with the modifications. In this case, please make sure beforehandthat your backup is readable, otherwise there will be wailing andgnashing of teeth.
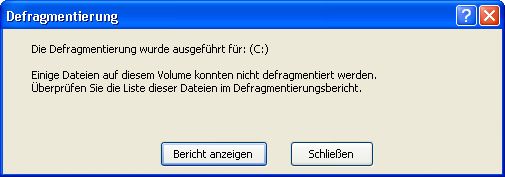
Click the "Close" button.
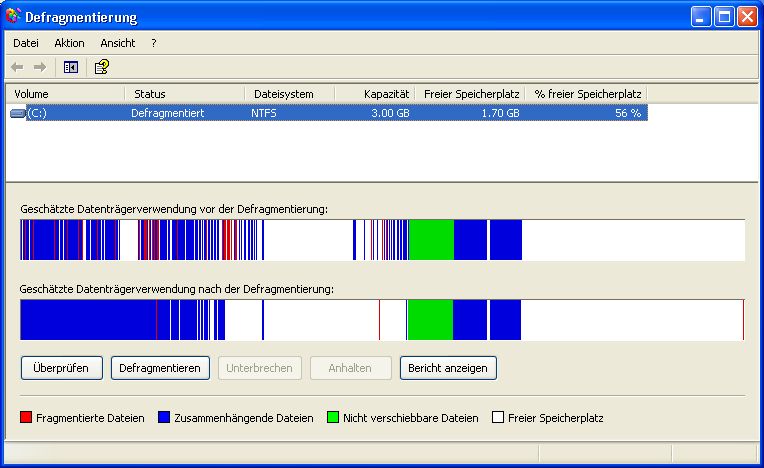
There is now space on the harddisk for additional partitions.
Shut down Windows.
创建分区(Creating partitions)
Creating partitionsNow you should plan the layout of your hard disk partitionsregarding file system and size. I recommend creating three or fourpartitions in addition to the Windows partition. The following exampleassumes you have exactly one Windows partition (drive letter C). Yourhard disk would then look like this:
First partition: NTFS or FAT32 (Windows)
Second partition: ext2 or ext3 (this is where Puppy will be installied to)
Third partition: Linux swap (for page files)
Fourth partition: FAT32 (for exchanging data between Windows and Linux)
Optionally, a fifth partition: ext2 or ext3 (Linux)
Windows will continue to reside on your first partition with all itsprograms and data. The second partition (recommended size about 1-2 GB)has a Linux file system (ext2 or ext3). This is the partition Puppywill be installed to. The third partition (exactly as large as yourcomputer's memory) will be a Linux swap partition that Linux can ...well, swap files to. The fourth partition has a FAT32 file system,which is recognized by both Windows and Linux. This partition(recommended size about 5 GB) is used for files that you want to accessfrom both Windows and Linux. If you want to manage large amounts ofdata under Puppy (e.g. music collection, pictures), you should create afifth partition with a Linux file system (ext2/ext3). This file systemcannot be accessed from Windows and is meant for Linux only.
To create the partitions, proceed as follows:
Start Puppy Linux from CD with the "pfix=ram" boot option.
Start the Gparted program: "Menu | System | Gparted partition manager".
First, shrink your Windows partition (NTFS file system). To do this, select the Windows partition /dev/hda1.
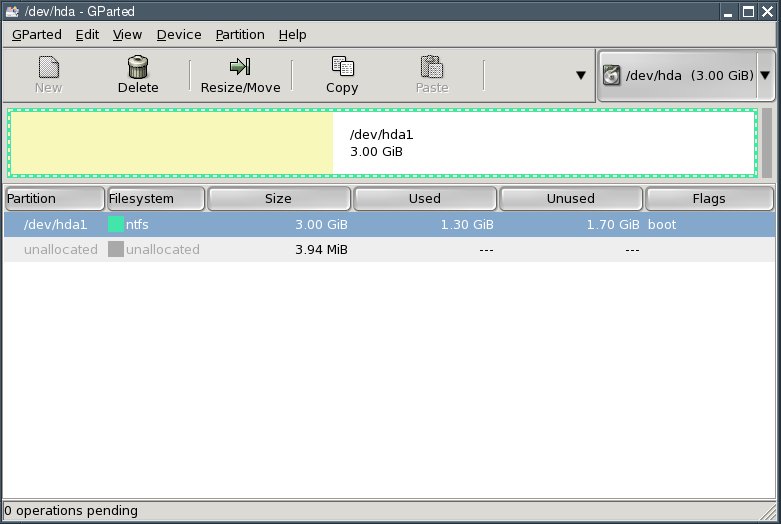
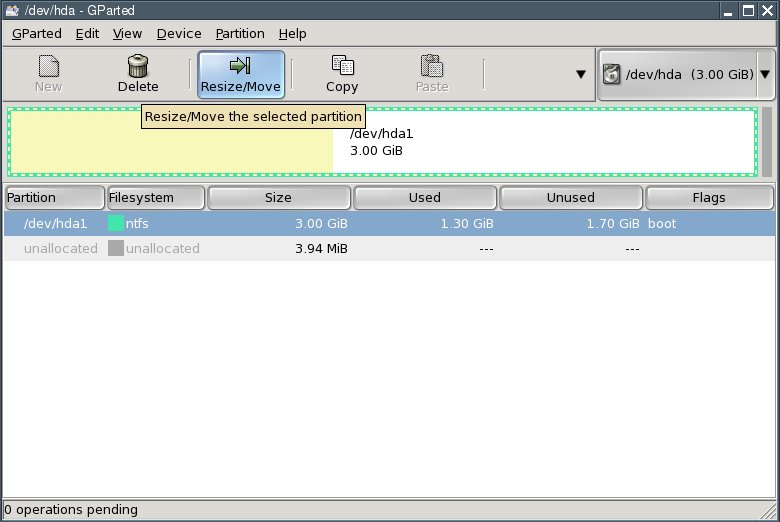
Click the "Resize/Move" button.
Reduce the "New Size" value until the "Free Space Following" fieldshows enough free space following for the new partitions. My testcomputer's hard disk has only 3 gigabytes; I am using half of that forthe mew partitions. You probably have a much larger hard drive so yourpartition sizes can be increased accordingly.
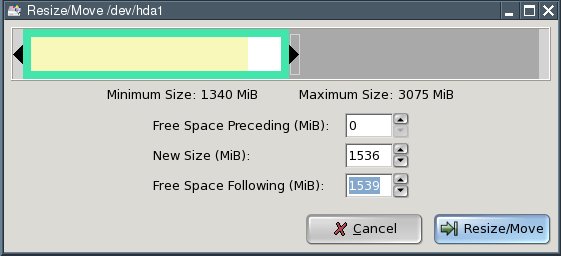
Then press the "Resize/Move" button.
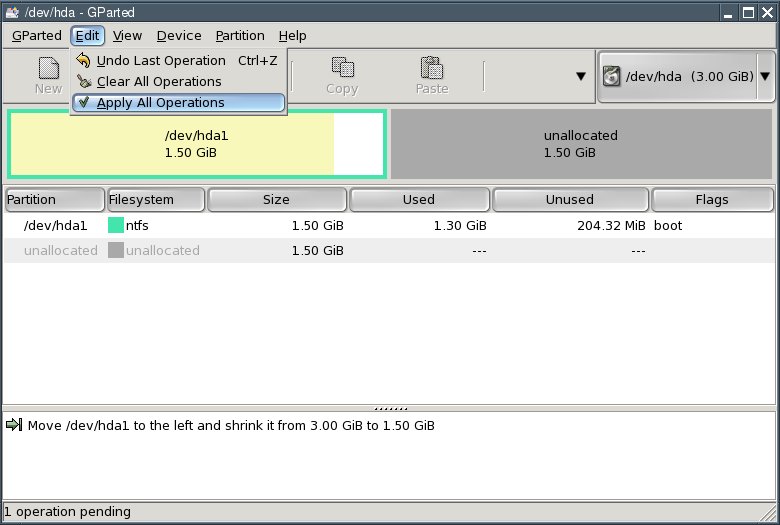
Next, select "Edit | Apply All Operations" from the menu.
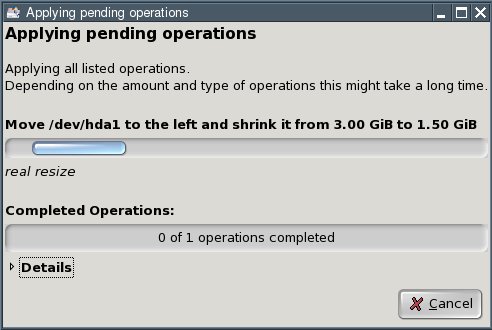
In the dialogue box that comes up, click the "Apply" button.

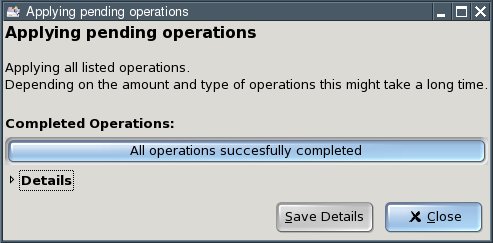
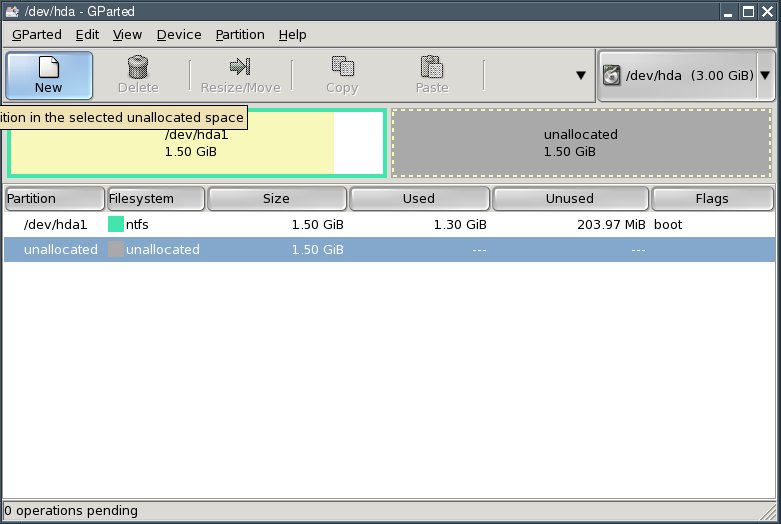
Click the "Close" button. You now have an "unallocated" area on your hard disk.
Select the line saying "unallocated" and click the "New" button.
Enter the size of the second partition in the "New Size" field. Thisis where Puppy Linux will be installed to. I recommend a size of 1 to 2gigabytes (i.e., 1024 to 2048 MB). Select ext2 from the "Filesystem"box and click "Add".

Again select the line saying "unallocated" and click the "New" button. (You can see where this is going.)

Enter the size of the third partition in the "New Size" field. Thispartition is to hold Linux's swap files as a Linux swap partition. Youshould make it as large as your computer's memory (RAM). With my testcomputer, this amounts to 128 megabytes (MB). Select linux-swap fromthe "Filesystem" box and click "Add".
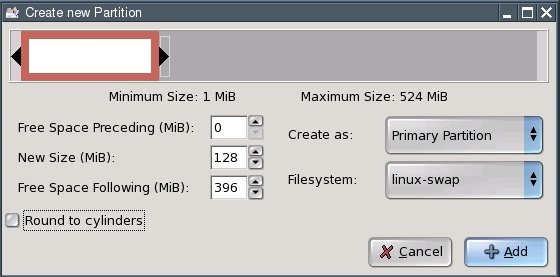
Again select the line saying "unallocated" and click the "New" button.

Enter the size of the fourth partition in the "New Size" field.Thispartition is meant for shared access to files from Windows and Linux. Irecommend a size of about 5 gigabytes (5120 MB). Since my test computerdoes not have a large enough hard disk, I am using 396 megabytes (MB)as an example. Select FAT32 from the "Filesystem" box and click "Add".
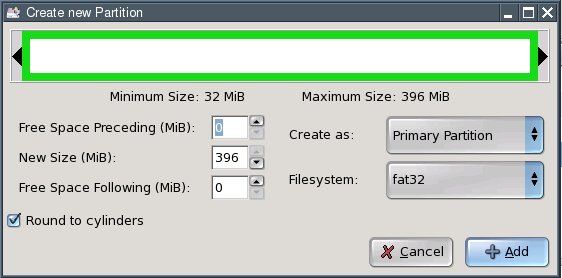
Hint: if you want to create additional partitions (e.g., for verylarge files under Linux), repeat the process outlined aboveaccordingly. In this case, you may have to create so-called logicalpartitions. Please consult additional sources if you are unsure abouthow to do that.
To actually write the changes to disk, select "Edit | Apply All Operations" from the menu.
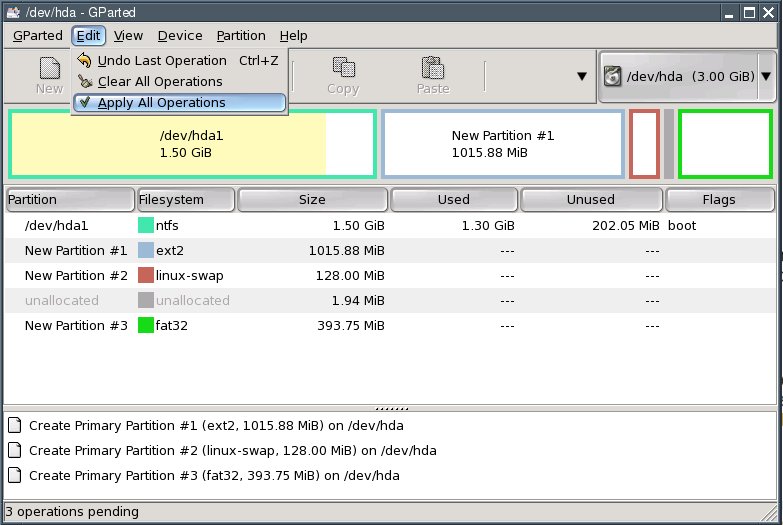
In the dialogue box that comes up, click "Apply".


Click the "Close" button.
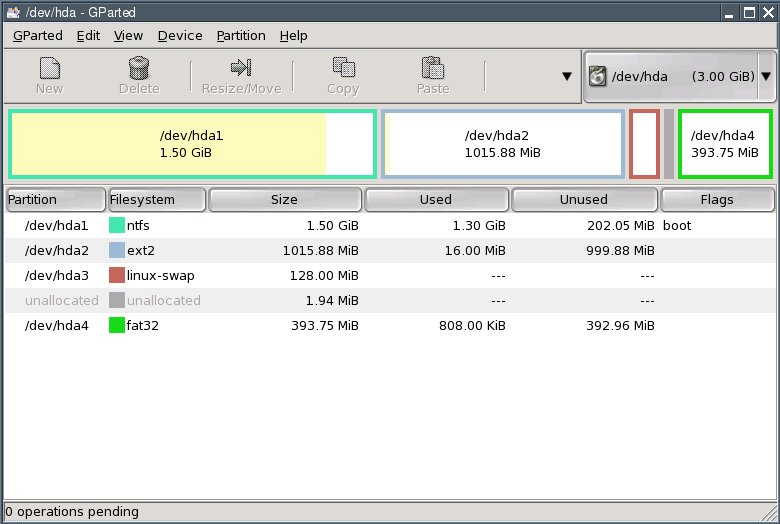
Exit GParted.
系统安装(Installation)
InstallationThere are different ways to install Puppy:
Frugal Installation (Pupy CD image on hard drive)
Full Installation
Installation to a USB flash drive
Installation to a CF card
I recommend Frugal Installation, if you have 256 MB RAM or more. If you have less than 256 MB RAM you should choose Full Installation.
简化安装(Frugal Installation)
这里介绍的是如何用Puppy通用安装程序来简化安装Puppy,其实,用Pup2usb安装Puppy到硬盘或U盘,也是简化安装的最简便方式。Frugal Installation using Puppy Universal Installer
A Frugal Installation copies the image from the Puppy CD to the harddrive. At bootup, Puppy is loaded into your computer's memory (RAM)just as it is when you boot Puppy from CD, however, loading it from ahard drive is much faster. This way, Frugal Installation combines theadvantages of booting from CD-ROM (protection from malware) and a harddrive bootup (speed). Moreover, upgrading to a new Puppy version isvery simple - all you have to do is replace some files.
Start "Menu | Setup | Puppy universal installer". Choose whichmedium Puppy should be installed to. In this example, I chose theinternal hard drive.
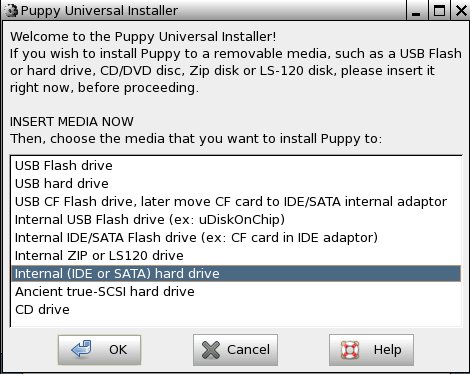
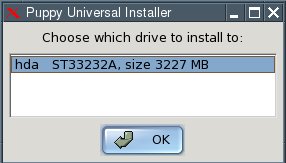
If you have several hard drives, select one.
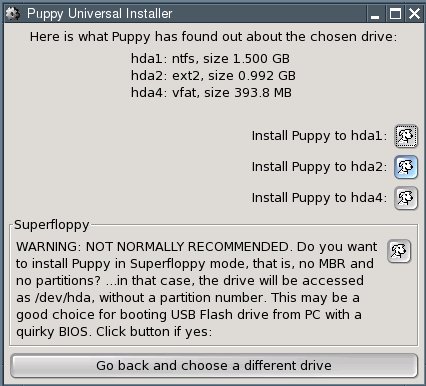
Next, click on the button next to the partition that you want Puppy to be installed to - /hda2 in this example.
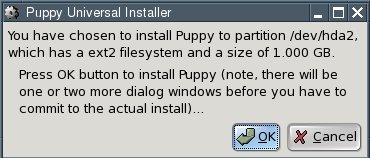
In the dialogue box, click "OK".
You now have to decide whether you want a "Frugal" or a "Full" installation. In our example, click on the "FRUGAL" button.

Now you change the installation directory. Just click on the "OK" button.

The files are now copied from CD to the hard drive.
The installation is finished. In the next two dialogue boxes, click "OK".
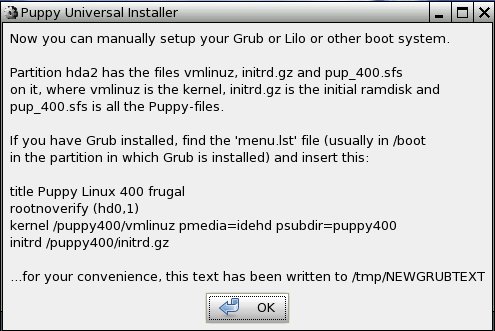

Since you now have two operating systems on your computer (Windowsand Puppy Linux), you need a boot loader. The boot loader is the firstprogram executed after switching the computer on. It enables you tospecify which operating system should be started up. If Windows was theonly operating system on your computer up to now, you do not have aboot loader. Start the installation of the boot loader GRUB with "Menu| System | Grub bootloader config".
Select "simple installation" and click "OK".
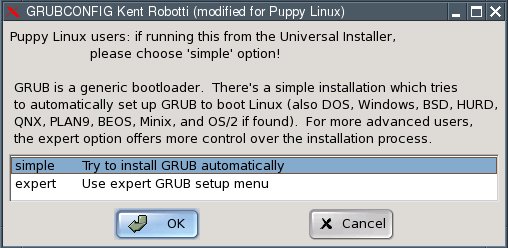
In the next dialogue box, select "standard" and click "OK".

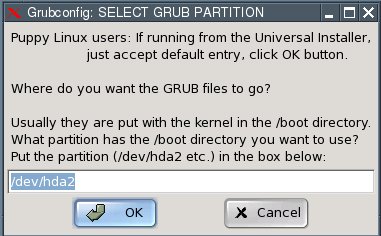
Now you have to specify where the GRUB boot loader should store itsfiles. These can only be written to a Linux file system partition.Thus, please specify one of the Linux (ext2 or ext3 file system)partitions you created (/dev/hda2 in the example). If you do not have aLinux file system partition yet, you need to create one.
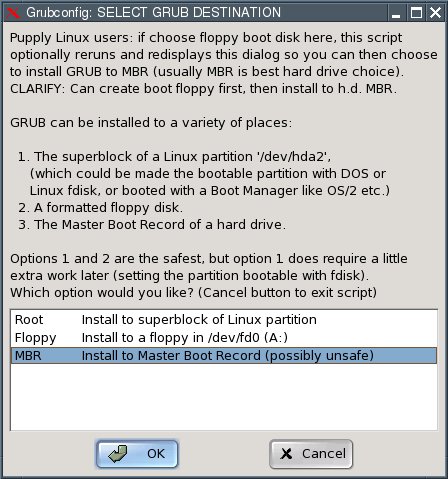
Now you have to specify where the GRUB boot loader itself should beinstalled to. Select the Master Boot Record "MBR" and click "OK".
In the next dialogue box, click "OK".

The installation is complete. What remains to be done is toconfigure the GRUB boot loader so that Puppy Linux can be booted. Thisis how to do it:
Open the file "menu.lst". You will find this file in the /boot/grubdirectory of the partition you installed the GRUB files to (/dev/hda2in our example). For Linux newbies, I include detailed instructions onhow to find and open this file. More advanced users can skip ahead towhere menu.lst gets edited.
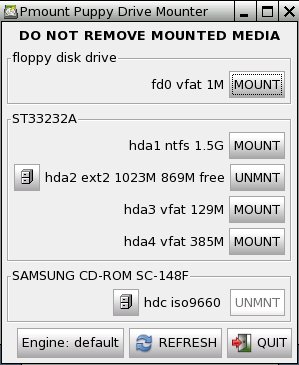
Start "Menu | Filesystem | Pmount mount/unmount drives" and click on the button "MOUNT" next to "/dev/hda2".

The button changes to "UNMNT".
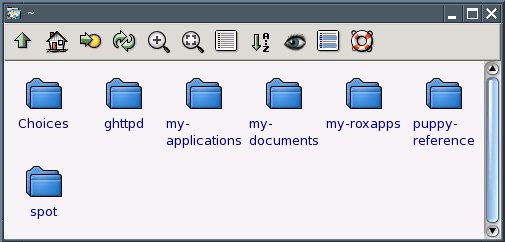
Start "Menu | Filesystem | ROX-Filer file filemanager".
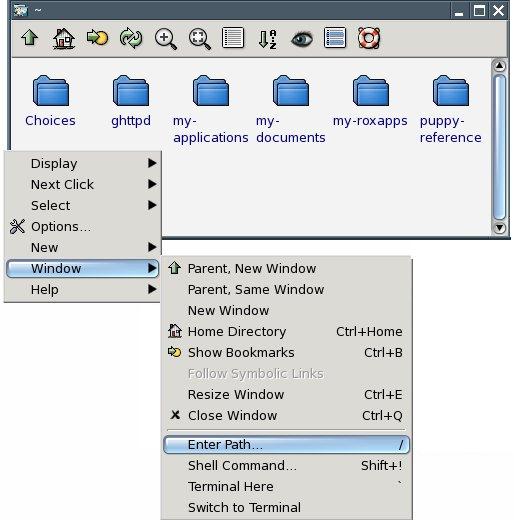
Right-click with the mouse and choose "Window | Enter Path".
Enter the following path next to "Goto: /mnt/hda2/boot/grub/
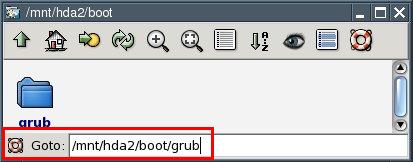
You are now at the folder /mnt/hda2/boot/grub/
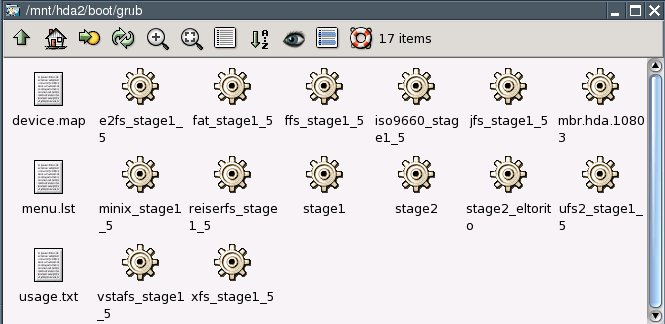
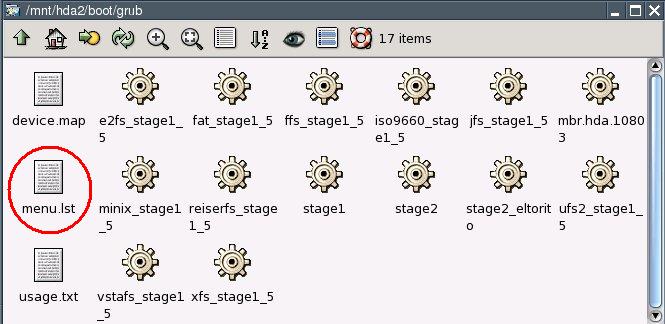
Use the right mouse button to click on the file called "menu.lst".
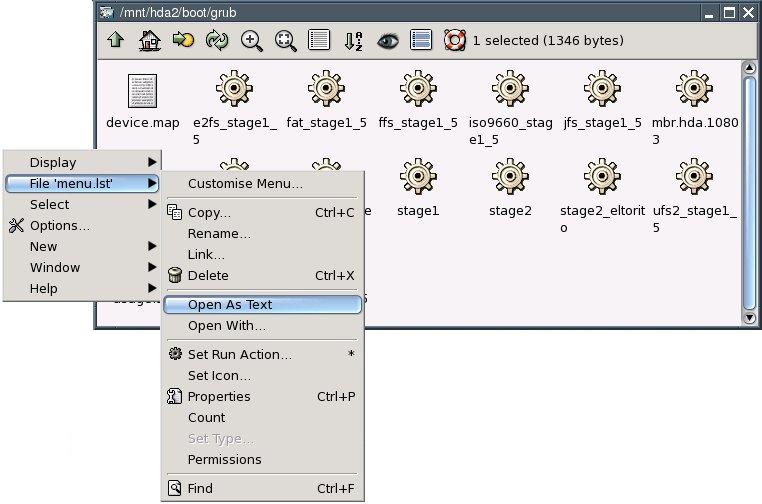
From the context menu that pops up, select "File menu.lst | Open As Text".
You can now see the contents of the menu.lst file.
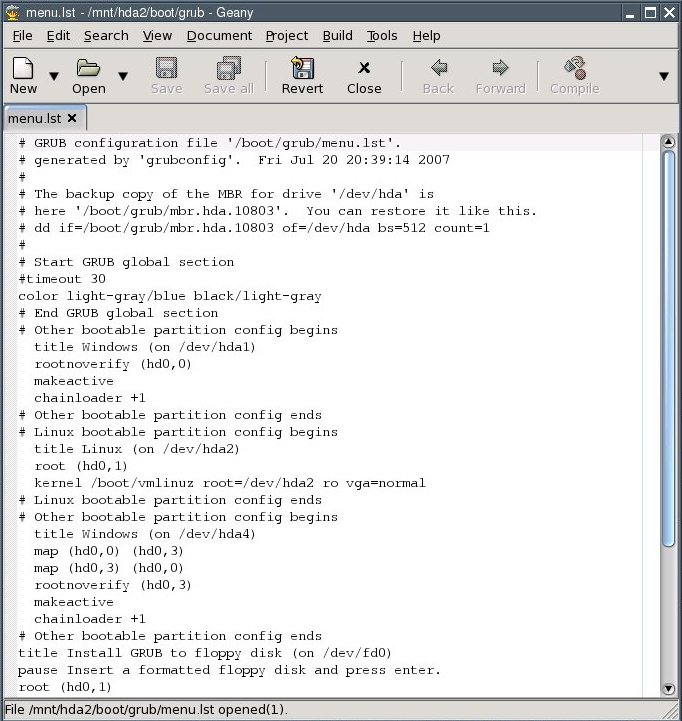
Edit the file at this point:
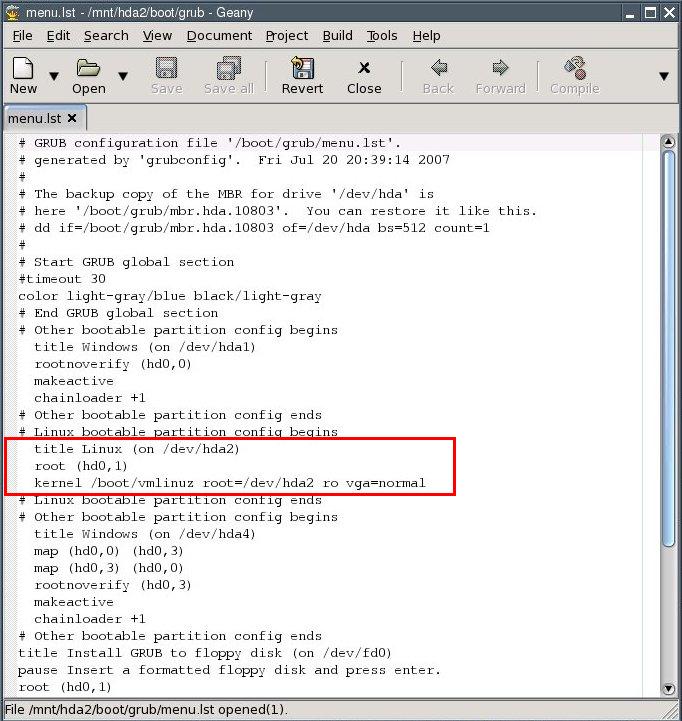
title Puppy Linux 4.00 frugal (on /dev/hda2)
rootnoverify (hd0,1)
kernel /puppy400/vmlinuz pmedia=idehd psubdir=puppy400
initrd /puppy400/initrd.gz
(Notice: depending on what medium you boot from, you have to set thepmedia parameter to one of usbflash, usbhd, usbcd, ideflash, idehd,idecd, idezip, satahd, scsihd or scsicd. If you did not install theGRUB files to the /dev/hda2 partition, you need to change therootnoverify parameter as well - partition number and Linux driveletter minus one, so if the GRUB files are on /dev/hdb3, make it"rootnoverify (hd1,2)".)
The bit you changed in the file should now look like this:
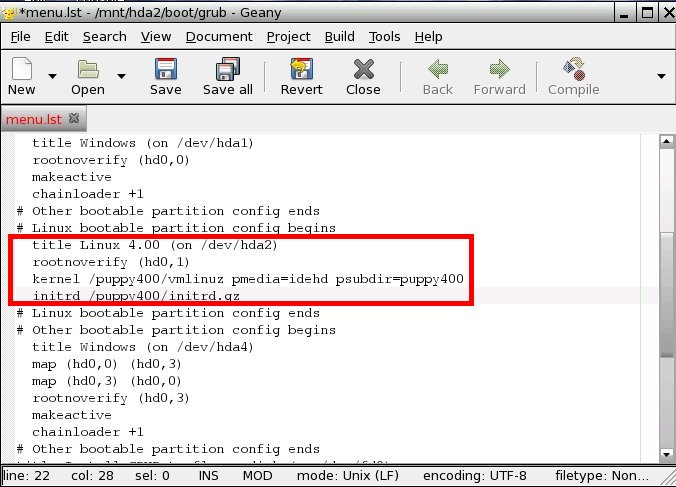
"Comment out", i.e. put a number sign (#) before each of the following lines:
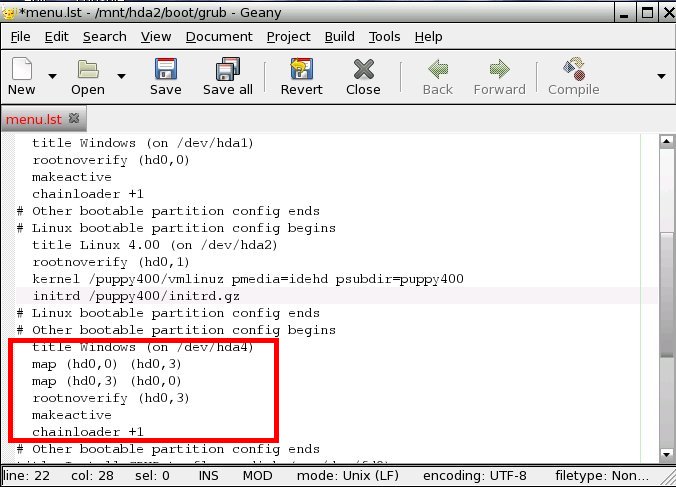
It should now look like this:

All necessary changes have been made. The file should now look like this:
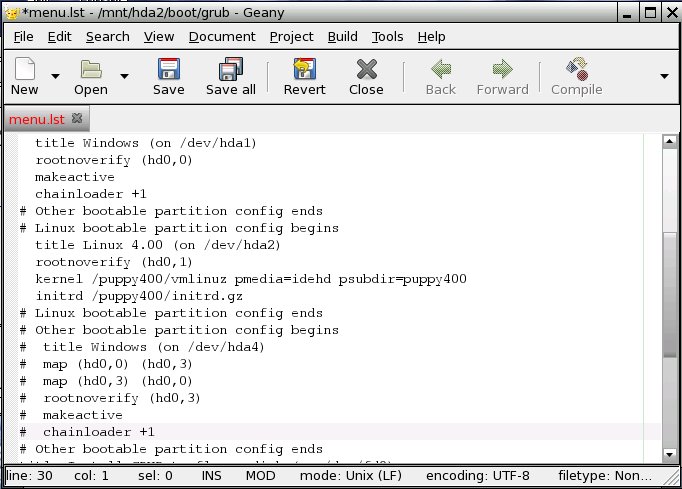
Save the file by selecting "File | Save" from the program's menu. Exit the text editor.
Close the ROX file manager.
Click on the button "UNMNT" next to /dev/hda2.
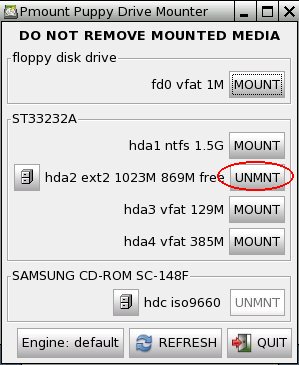
The button changes to "MOUNT".
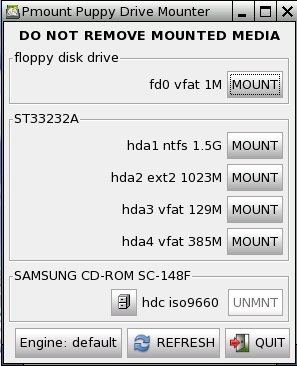
Click on the button "QUIT".
Exit Puppy and reboot the computer: "Menu | Shutdown | Reboot computer".
When you reboot the computer, you will be asked whether you want tosave the "session" (i.e., all the configuration changes you made). HitReturn to select the entry "SAVE TO FILE", which is alreadyhighlighted.
Confirm the next dialogue (Warning) by hitting Return.
In the next dialogue, select the "hda2" partition with the cursor keys and press Return.
Now. you will be asked, if the file should get a special filename. Just press Return.
You will be asked whether you want a normal (unencrypted) or anencrypted save file. Select "NORMAL" with the cursor keys and pressReturn.
The next dialogue lets you choose a size for your save file. A filesize of 512 megabytes is usually sufficient. You can increase (but notdecrease) this size anytime from within Puppy. Pick the desired filesize with the cursor keys and press Return.
In the next screen you see a summary. Choose "Change Folder" and press return.
Next, you enter "/puppy400" as subfolder and confirm with return.
Again a summary is shown and if everything seems to be ok, choose "Yes, save" with the arrow keys, then press return.
Please be patient while the file is created.
Next you will be asked if Puppy 4.xx should test for serial devicesat each boot. Choose ""No" with the arrow keys and confirm with return.
Now you decide wether the system file pup400.sfs should be copiedover to the harddrive. Choose "Yes" with the arrow keys and confirmwith return.
Last not least the computer restarts automatically. Remove the PuppyCD from the drive before the shutdown is complete. Upon reboot the bootloader will show up. Choose ""Puppy Linux 4.00 frugal (on /dev/hda2)""with the arrow keys and confirm with return.
手动安装(Manual Installation)
Manual InstallationTo be able to use this option, a boot loader has to be installed on your computer. If there is no boot loader installed on your computer, I recommend doing so using the Puppy Universal Installer.
Boot Puppy fom CD with the "puppy pfix=ram" boot option.
Create a new directory "puppy400" onto a partition with a Linux file system (ext2/ext3) or a FAT32 file system.
Copy the files
pup_400.SFS
zdrv_400.SFS
initrd.gz
vmlinuz
into this directory. If you are updating Puppy, overwrite the existing files. Reconfigure the GRUB boot loader by editing the menu.lst file. You will usually find this file on a Linux partition in the /boot/grub folder.
Append the following two lines to the file menu.lst:
title Puppy Linux 4.00 frugal (on /dev/hda2) rootnoverify (hd0,1) kernel /puppy400/vmlinuz pmedia=idehd psubdir=puppy400 initrd /puppy400/initrd.gz
Notice: (hd0,1) signifies the hard disk and partition on which GRUB is stored. Depending on your boot medium, you will need to set the pmedia parameter to one of usbflash, usbhd, usbcd, ideflash, idehd, idecd, idezip, satahd, scsihd or scsicd.
Save the file menu.lst
Close the text editor. Remove the Puppy CD from the drive and exit Puppy without saving your session. Reboot the PC. Puppy should now boot without the CD in the drive.
完整安装(Full Installation)
完整安装需要在硬盘里专门划出一个ext2/3/4分区,完整安装后,直接卸载半步中文体验包(或一步到位中文包)可能会导致系统无法启动或无法进入X图形界面,也无法外挂sfs镜像文件。如果没有特别需求,不推荐用这种方式来安装Puppy Linux。
Full Installation
A Full Installation installs Puppy onto the hard drive like any other"normal" Linux. This kind of installation is a good idea if you haveless than 256 MB of memory.
Start "Menu | Setup | Puppy universal installer". Select the mediumthat you want to install Puppy to. I chose the internal hard drive forthis example.

If you have more than one hard drive, choose one.

Click the button next to the partition that you want to install Puppy to.

Confirm the next dialogue by clicking "OK".

You now have to decide whether you want a "Frugal" or a "Full"installation. Since this chapter describes a Full installation, clickthe button labelled "FULL".
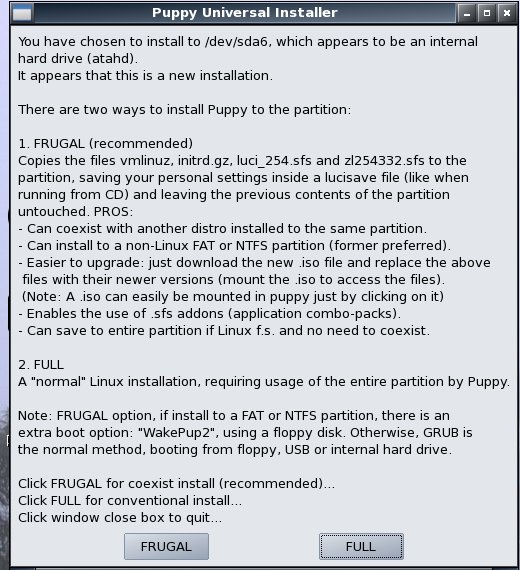
The files will be copied from the CD to the hard drive.


Since you now have two operating systems on your computer (Windowsand Puppy Linux), you need a boot loader. The boot loader is the firstprogram executed after switching the computer on. It enables you tospecify which operating system should be started up. If Windows was theonly operating system on your computer up to now, you do not have aboot loader. The Puppy Installer can install GRUB as a boot loader foryou. To do this, click on "INSTALL GRUB".

In the next dialogue box click "Install"

Confirm the next dialogue by clicking "OK".
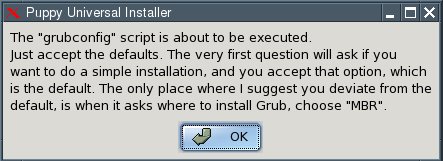
Select "simple installation" and click "OK".

In the next dialogue box, select "standard" and click "OK".

Now you have to specify where the GRUB boot loader should store itsfiles. These can only be written to a Linux file system partition.Thus, please type "/dev/hda2" - that is, the same partition to whichPuppy has just been installed.

Now you have to specify where the GRUB boot loader itself should beinstalled to. Select the Master Boot Record "MBR" and click "OK".

Confirm the next dialogue by clicking "OK".

In the next dialogue box, click the "No" button.
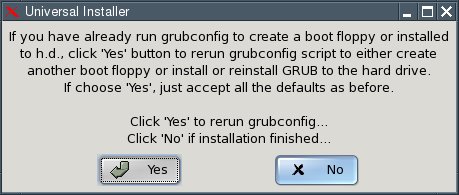
The installation is complete. What remains to be done is toconfigure the GRUB boot loader so that Puppy Linux can be booted. Thisis how to do it:
Open the file "menu.lst". You will find this file in the /boot/grubdirectory of the partition you installed the GRUB files to (/dev/hda2in our example). For Linux newbies, I include detailed instructions onhow to find and open this file. More advanced users can skip ahead towhere menu.lst gets edited.
Start "Menu | Filesystem | Pmount mount/unmount drives" and click on the button "MOUNT" next to "/dev/hda2".

The button changes to "UNMNT".

Start "Menu | Filesystem | ROX-Filer file filemanager".

Click with the right mouse button and choose "Window | Enter Path" from the context menu.

Type this into the box labelled "Goto" (do not omit the slash at the end): /mnt/hda2/boot/grub/
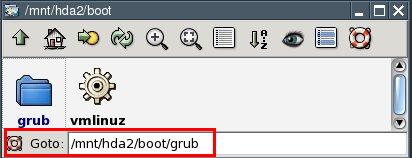
You are now inside the /mnt/hda2/boot/grub/ folder.
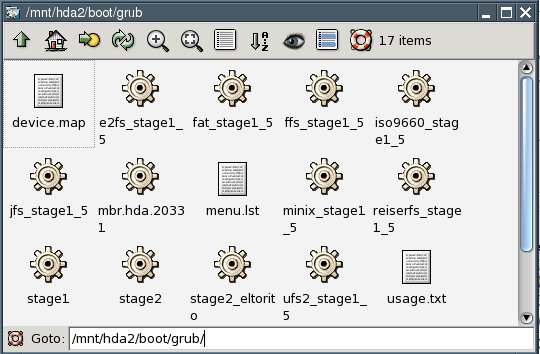
Use the right mouse button to click on the file called "menu.lst".
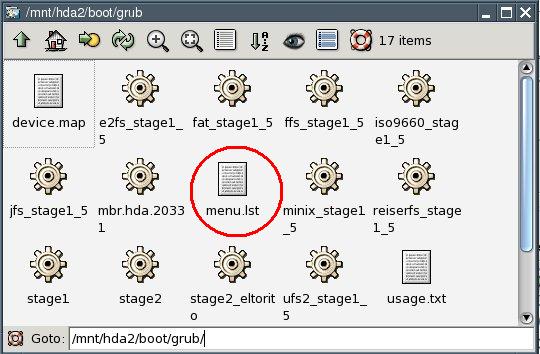
From the context menu that pops up, select "File menu.lst | Open As Text".

You can now see the contents of the menu.lst file.
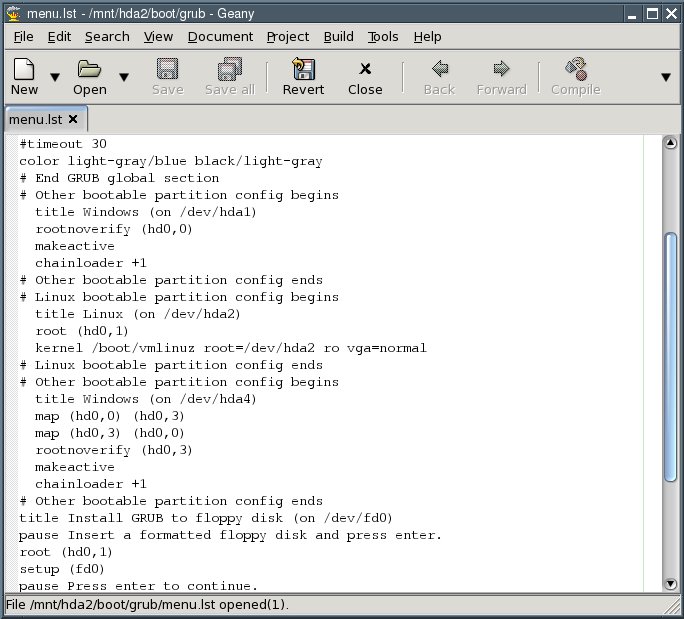
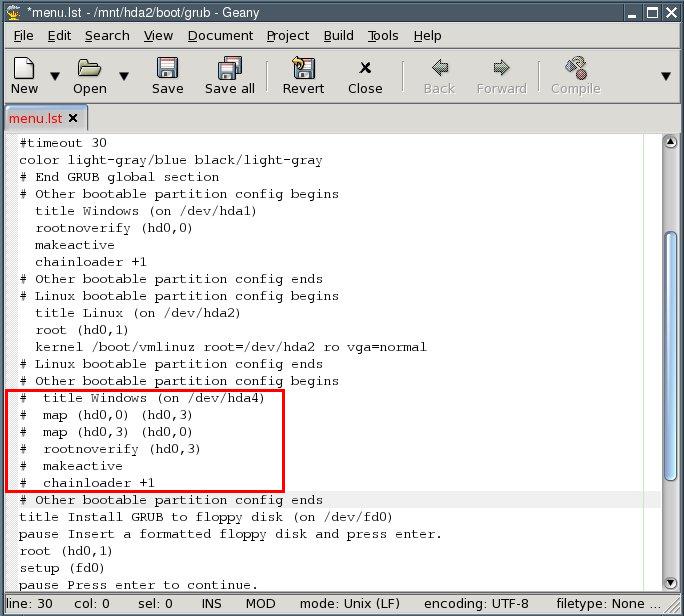
"Comment out", i.e. put a number sign (#) before each of the following lines:
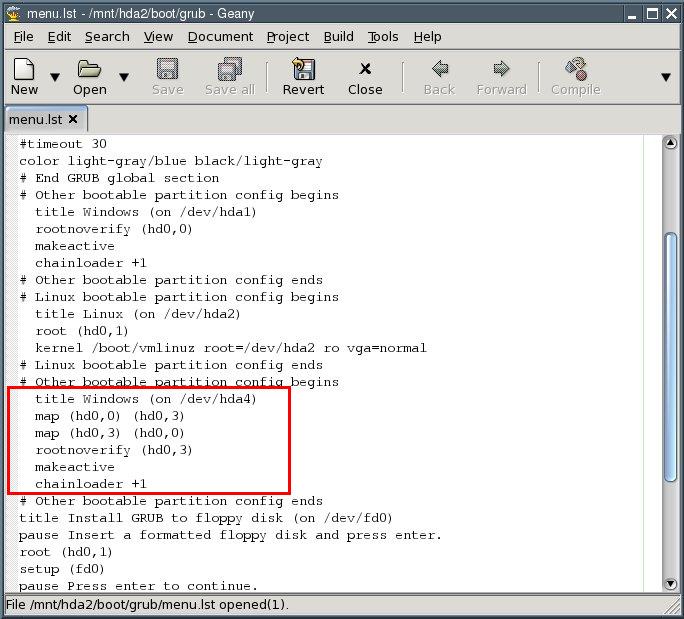
All necessary changes have been made. The file should now look like this:
Save the file by selecting "File | Save" from the program's menu. Exit the text editor.
Close the ROX file manager.
Click on the button "UNMNT" next to /dev/hda2.

The button changes to "MOUNT".

Exit Puppy and reboot the computer: "Menu | Shutdown | Reboot computer".
When you reboot the computer, you will be asked whether you want tosave the "session" (i.e., all the configuration changes you made).Select "DO NOT SAVE" with the cursor keys and hit Return.
Your computer will now shut down completely and then start up again.You will then see the boot loader come up. Select "Puppy Linux (on/dev/hda2)" with the cursor keys and press Return. Puppy boots up. Atthe first bootup, you will once again have to specify your country andyour screen resolution. This configuration is saved so that you do nothave to repeat this process at the next bootup.